
|
|
|
|
Blade Pro Lesson SixWhew, lesson 6 time already...More on the slider adjustments Here once again, the Blade Pro interface!
For this lesson, we will refer mainly to buttons #18, #19, #20, #21, #22, #25, and #26. Remember, click on the smaller image above to get a larger-sized version you can print out to refer to.
|
|
|
Glassiness (slider #18) Lower values on the slider produce an opaque effect, higher values a glassy one. The color of your original image becomes the color of the glass, the higher the height (or depth) of the bevel, the more of a glassy effect you will get.
Caustic slider (button #19) -
This slider controls
the brightness of the highlight on a glass effect, it's very subtle. The caustic is
the bright highlight opposite the light source (we'll get to those later!)
Click on button #25
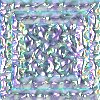
Iridescence (slider #20) and Iri colors (slider #21 These two sliders work together to produce iridescent colors and effects. Slider #20 all the way to the left will produce no effect. Increasing values produce more of a "soap bubble" effect, depending on the texture used. Slider #20 affects the colors of the iridescence.
Tarnish slider (slider # 22)
Okay, enough studying for now, go have a nice
snack and then make something pretty! |
|
|
|
|
||
|
|
|
|
Please join us at LVS Online for the best in online education. Filter Frenzy classes focus on Photoshop-compatible plugins. Xara X is taught by Ron Lacey and myself, and the rest of the 45+ classes are terrific, as well. We add new classes every session, so if we don't yet offer a class in something you want, keep watching, or better yet, email a suggestion to questions@lvsonline.com!

© Sally Beacham and Dizteq.com 1999-2002
)

 white
image, faceted diamond preset, default glassiness is 42.
white
image, faceted diamond preset, default glassiness is 42.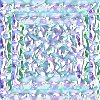 same image,
same preset, glassiness set at 0.
same image,
same preset, glassiness set at 0.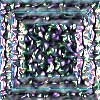 same
image, same preset, glassiness set at 100.
same
image, same preset, glassiness set at 100.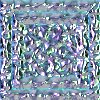 black
background, same preset, glassiness set at 0.
black
background, same preset, glassiness set at 0.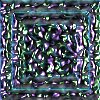 black
background, same preset, glassiness set at 100.
black
background, same preset, glassiness set at 100.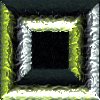 bottle
preset with glassiness at 100, caustic at 100 and white setting.
bottle
preset with glassiness at 100, caustic at 100 and white setting.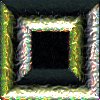 same
preset, same settings on sliders, prismatic setting.
same
preset, same settings on sliders, prismatic setting.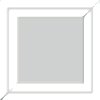 white
image, plain preset, iridescence 0, iri colors 0.
white
image, plain preset, iridescence 0, iri colors 0.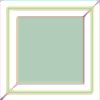 same
image, same preset, iridescence 40, iri colors 30.
same
image, same preset, iridescence 40, iri colors 30.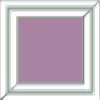 same
image, same preset, iridescence 55, iri colors 70.
same
image, same preset, iridescence 55, iri colors 70.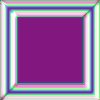 same
image, same preset, iridescence 100, iri colors 40.
same
image, same preset, iridescence 100, iri colors 40.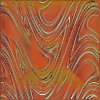 white
image, rusty zebra preset, tarnish default setting 38, tarnish color green.
white
image, rusty zebra preset, tarnish default setting 38, tarnish color green.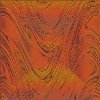 same
image, same preset, same color, tarnish set at 0.
same
image, same preset, same color, tarnish set at 0.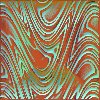 same
image, same preset, same color, tarnish set at 100.
same
image, same preset, same color, tarnish set at 100.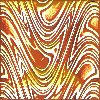 same
image, same preset, tarnish set at 100, tarnish color yellow.
same
image, same preset, tarnish set at 100, tarnish color yellow.