Blade Pro Lesson Seven

Lesson 7, already?   Yes, it's true....

Light Sources and Blend (Glue) Modes


    Now we'll cover the light source controls and the blend mode button.... and maybe make something fun too!

    BPinterfaceWnum.gif

    In this lesson, we will refer to buttons #23, #24, #27, #28, #5, #31 and #32, and the letters... no wait, that's another show... smile.


LVS Online - The Leader in Virtual Studies

Graphics Software Featured Site

    Light Source controls (#23 and #24)

     These two controls affect the light reflected onto your image.  Buttons #27 and #28 control the color of the light. 

    Lights Controls in Super Blade Pro

    To change the direction of the light, grab one of the tiny blue balls with your mouse and move it within the gray circle.  Placing the tiny ball in the middle of the larger blue ball will result in the light being reflected from directly in front of the image, as if the light were between the viewer ( that's YOU ) and the image.

    Conventional wisdom (is there such a thing as UNconventional wisdom, if so I'll have some of that!) says that the light probably comes from above, like the sun.  So if you keep the light direction in the upper half of the gray circles, that is the most natural setting.  But I say, WHO cares about NATURAL, after all we are simulating stuff in the first place!

    In addition to the lights direction controls, Super Blade Pro adds light colour chips and sliders (Sliders #27 and #28.) Moving the sliders upward add more of the chosen light colour to the preset effect.

    This is the default setting for the basic gold preset that you must be totally sick of by now.


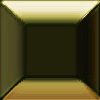
    Same image, same preset, the light controls have been moved to the bottom and the second light color changed to white.  The bottom edge of the gold button now has a large white highlight area.


    In some cases, changing the light direction can produce a totally different look, especially on highly textured images.

     Button #5... The Glue Modes

    As much as I would like to tell you how the Glue ModesGlue Mode button work, I think if I SHOW you the differences, it will probably be more meaningful ( and that way I sort of get out of giving you a highly technical gobbledygook explanation, too!)  Click here to see a display of all the Glue Modes!

    Zoom and Auto Preview Controls

    The check box on #31 is an Auto-Preview enable, when this is checked, your preset changes will update in the Preview panel (#7.)   You can click on the + or - signs on either side of the Zoom indicator (#32) to change the zoom factor in the Preview panel.


    Some additional controls added to Super Blade Pro!

    Super Blade Pro adds some additional controls.  Let's begin with button #33 Super Blade Pro's Plain Bevel button, which is a plain bevel setting.  Clicking this button will override any other settings, and produce a clear bevel over your original image.

    Button #34 Super Blade Pro's UnDois a one-level UnDo button (if you lose your pretty preset because you hit the dice one too many times, you can go back now, but just ONE level.)  Button #35Super Blade Pro's Random Seed button is a Random Seed button, which will change the detail of the blotch slider #45.)

    Super Blade Pro also added the new environmental distress controls (that's my term, I really don't know what they call them at Flaming Pear!)

    The Rain slider #36 simulates water falling from the top of th image or selection. The Evaporation slider #37 controls the rate of water evaporation. The Diffusion slider #38 controls the horizontal spread of water. The Wander slider #39 allows the water to wander sidewarys over flat areas instead of dripping straight down.  

    There are two rain color buttons. The second button sets the colour which becomes more prominent when the Rain slider setting is high.The wet/dry checkbox Rain slider wet/dry checkbox controls whether the rain is opaque or transparent..

    The next series of sliders produces weathered effects.

    The Dust slider #40 controls a dull powdery appearance that appears on upward-facing surfaces. The Grit slider #41 adds high-frequency noise to the texture.  The Tarnish slider # 22 adds puts dull, matte color in the hollows on a surface.  Change the colour of the tarnish with the colour chip to the right of the slider.The Abrasion slider #42 is similar to Tarnish, but it puts dirt on convex areas, or bumps.  The Moss slider #43 places moss-like matter on upward-facing surfaces.  Moss has color buttons for the moss and for it's underlying soil. The Leakiness slider #44 allows the moss to leak water, and causes the blotches to soak it up.  The Blotches slider #45 grows blobs. You can control; the blotch size and colour.


    All righty then, that is IT for the Blade Pro interface (and Super Blade Pro), but since we are on a roll here, I will post a couple more lessons with some projects, and hope you will send them to the group for our viewing pleasure!   Let the filtering begin!


                                      Back to Lesson One!


Please join us at LVS Online for the best in online education.  Filter Frenzy classes focus on Photoshop-compatible plugins.  Xara X is taught by Ron Lacey and myself, and the rest of the 45+ classes are terrific, as well.  We add new classes every session, so if we don't yet offer a class in something you want, keep watching, or better yet, email a suggestion to questions@lvsonline.com! 

Email Sally @ sbeacham@dizteq.com

© Sally Beacham and Dizteq.com 1999-2002