A guideline to use to determine how big your mat
and frame should be (it's only a guideline, larger or smaller
may look better in any specific instance!) - take the number
of pixels in height, PLUS the number of pixels in width of the
image you want to frame, and then add 10 to 20 % of that
as your mat/frame area. So, if you have an image that is 400x600
pixels, you may wish to add borders (or increase the canvas
size) by 100-200 pixels PER SIDE. (400 + 600 = 1000, 1000
x .10 = 100 OR 1000 x.20 = 200)
Here I've started with a 200x300 pixel
photo, and added 100 pixels to each side of the canvas.
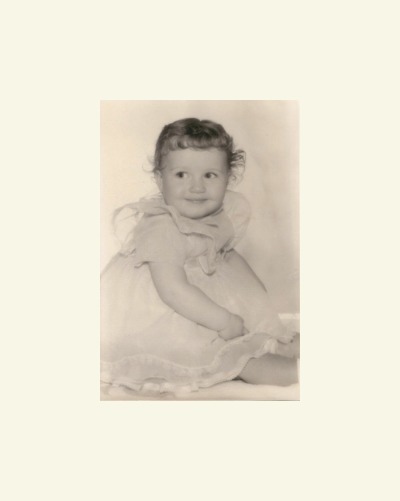
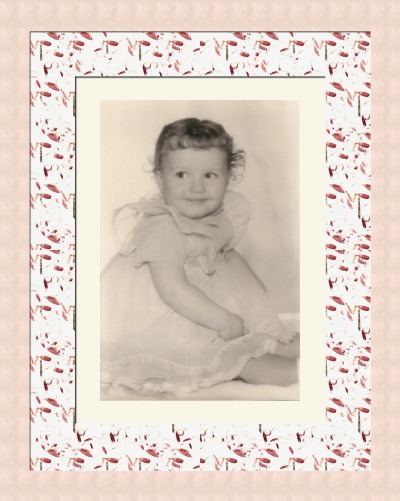
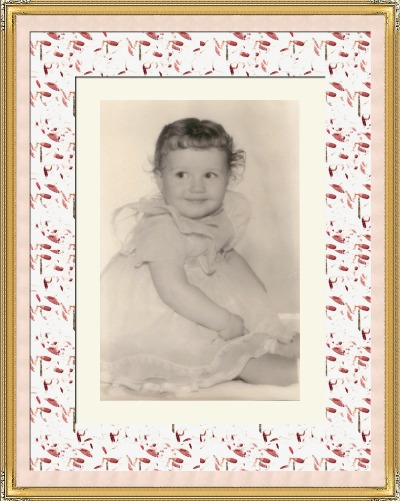
Image from an original baby
by Phyllis and Charles Bradbury
Once you are satisifed with
your image dimensions, go to Effects/Plugin Filters/Alienskin
Splat! Demo (or you may be using the full version.)
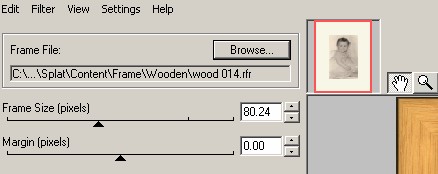
The Edit menu
has options for Undo (CTRL z), Cut (CTRL x), Copy (CTRL c) and
Paste (CTRL v) just like in PSP. The Filter menu
allows you to quickly move from one plugin to another in the
Splat! suite. The View menu lets you Zoom In, Out,
or show Actual Pixel size, in the Preview Pane. The Settings
menu is where you will save, load and manage presets. THe
Help menu takes you to the Alienskin site. (There's
a great little manual shipped with the CD of Splat!)
Click on the Browse
button to browse to the Frame folder within the Content
folder of Splat! in your Plugins folder. (Frame
files can be stored in folders outside Splat! too, just browse
to the folder you want to use!) Frame files are .rfr
format.
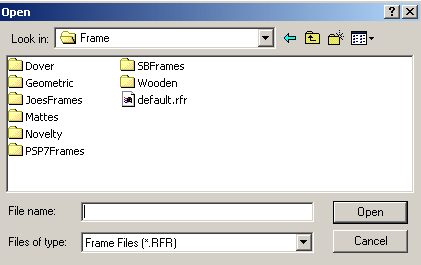
Splat ships with several
frame folders, including Dover, Geometric, Mattes, Novelty and
Wooden. You can add your own folders, as you see I have
done here. Browse to a frame file you like. You'll
see a little preview in the bottom left corner of the Open
dialog, this will help you make your choice!

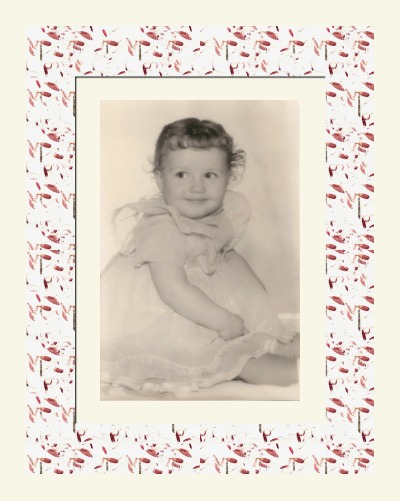
Click on Open and
your frame choice will be applied around the edges of your image
in the Preview Pane. Use the Frame Size
slider to adjust the size of the frame around the image, and
use the Margin Slider to align the outside edge of the
frame. A value of 0 will align the edge of the frame with
the edge of the image. Positive values move the frame
in toward the center of the image, negative values move it over
the outside edges of the image. If you have a selection
active inside your image, negative margin values will cause
the frame to overlap the edges of the selection.
Here I've applied my sb_mat_hmpaper2
mat with a frame size of 100 and a margin setting
of 55. You may need to change those settings for your own
image, dependent on it's size. I wanted to leave a little
of the cream coloured border I added in the preparation of the
image, so that becomes part of the frame effect. Hit OK,
and the mat is applied
Load Splat! again.
This time I've chosen my sb_mat_pinksalt
mat, with a frame size of 60 and a margin setting
of 0. The outer cream coloured borders are now completely
covered, with the overlapping mats. Click OK to
apply this mat as well.
Load Splat! once again,
and browse to a frame file. I've used one of Joe
Cilinceon's Gold Frames here, with a frame size of
80 and a margin setting of 0. Voila, a
framed and matted photo!
This image uses one of the
Splat! mats that come with the plugin, with frame size of
100 and a margin setting of 0. A Dover
frame - Art Nouveau074 was then applied, with a frame
size of 20 and a margin setting of 100. Finally,
the same Dover frame with a frame size of 40 and a margin
setting of 0 was applied. (Remember, these settings
are dependent on the size of the graphic you are working with,
you may need to modify them with the sliders or numeric entry
boxes to achieve the same look on a different sized image.)
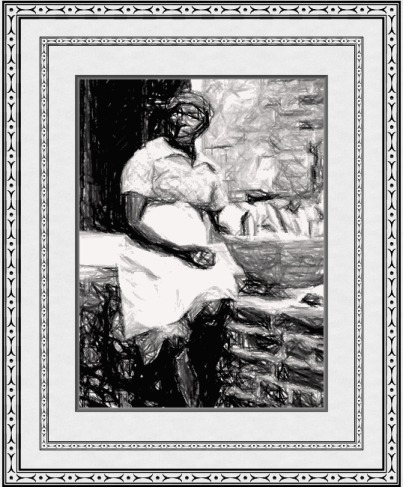
Image from
an original photo by Ron Lacey
This image has a mat made
with sb_mat_goldmulberry
applied with a frame size of 150 and a margin
setting of 100. One f Joe's frames, jc_moldwood2_2
was applied with a frame size of 90 and a margin
setting of 50, and then reapplied with a frame size of
140 and a margin setting of 0.
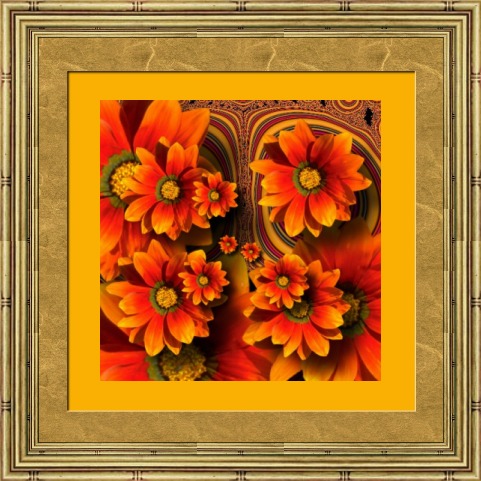
Original image
by Phyllis and Charles's little girl.
Enjoy Splat! and
the frames and mats you find here. If you like the results
you get, drop me a line, at sbeacham@dizteq.com!