

|
|
|
|
Blade Pro Lesson ThreeTextures and Environments - Welllllllll, here I am again, with the next stage in our exploration of the Blade Pro interface. Hope you are not either overwhelmed, or bored silly. If so, take two aspirin and/or two beers, stand on your head, look at the screen and it will all make much more sense to you. We will refer to our lovely enumerated Super Blade Pro interface repeatedly, so here it is again for your convenience! (Click on the small version to get a full size version you can print out.)
We will refer to buttons #2, #3, #4, #29 and #30 for the most part in this lesson. |
|
|
Textures - Button #3
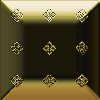
Click on button #2 Now let us assume that none of those built-in textures strikes your fancy. (Where exactly IS your fancy, can anyone tell me? And is it a GOOD thing to have your fancy stricken? Things that make you go hmmmmmm....) You can use ANY bitmap as a texture source. It's best if it's 150x150, but I have used larger. Click on the last choice in the bitmap dropdown menu, the one that says BMP. Then navigate to the texture file you wish to use. It can be located anywhere on your hard drive. You do NOT have to have it in your environments and textures folder, though if you decide to use that particular texture a lot, it's a good idea to put it in a folder where you won't move it, cause BP will look for it if you decide to save the effect as a preset (no, you don't know how to do that yet, later in the show.) Here's a little fleur-de-lys pattern I used
as a texture bitmap, I reduced the size of the texture with the slider (button
#29
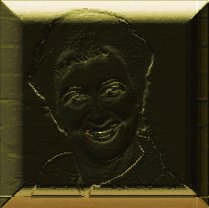
You can even use a photograph of someone, someone perhaps you know quite well, someone who should be immortalized in precious metal for all time....
ENVIRONMENTS! - More fun with
bitmaps! Button #4 If you want to change the environment .bmp, click directly on the button and then navigate to the file you want to use.
If you click on button #30 Okay, go play some more! Today environments and textures, tomorrow PRESET files, using them, finding them and making your own! And the ever popular randomizer! |
|
|
|
|
||
|
|
|
|
Please join us at LVS Online for the best in online education. Filter Frenzy classes focus on Photoshop-compatible plugins. Xara X is taught by Ron Lacey and myself, and the rest of the 45+ classes are terrific, as well. We add new classes every session, so if we don't yet offer a class in something you want, keep watching, or better yet, email a suggestion to questions@lvsonline.com!

© Sally Beacham and Dizteq.com 1999-2002
)

 is the texture
bitmap button. Some preset effects use a texture, some do
not. The basic gold effect we have been using does not, it is a flat
shiny effect. The button will be blank when you first apply this
preset. So we like that look,
but let's say we'd like something a little rougher in appearance, something
like oh say THIS
is the texture
bitmap button. Some preset effects use a texture, some do
not. The basic gold effect we have been using does not, it is a flat
shiny effect. The button will be blank when you first apply this
preset. So we like that look,
but let's say we'd like something a little rougher in appearance, something
like oh say THIS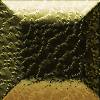
 controls your environment bitmaps. These
images are similar to textures, but they can be and probably are very
colorful, because often they will affect the finished color of your image, or
the color of any reflection. The basic gold preset we have been
experimenting with uses a bitmap within your environments and textures folder
called (oddly enough) gold.bmp.
controls your environment bitmaps. These
images are similar to textures, but they can be and probably are very
colorful, because often they will affect the finished color of your image, or
the color of any reflection. The basic gold preset we have been
experimenting with uses a bitmap within your environments and textures folder
called (oddly enough) gold.bmp.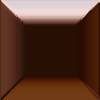 same filter,
copper.bmp
same filter,
copper.bmp  same filter,
sea and sky bmp. (note how the new image produced a slightly more
angular beveled effect.)
same filter,
sea and sky bmp. (note how the new image produced a slightly more
angular beveled effect.)
 same filter,
pinkglass .bmp from a stained glass set someone sent me. The only
setting I changed on all three of these images was the environment
bitmap.
same filter,
pinkglass .bmp from a stained glass set someone sent me. The only
setting I changed on all three of these images was the environment
bitmap.