
|
|
Here's a procedure for making a tiling pattern with Sinedots II and Paint Shop Pro 7.04's Kaleidoscope filter effect. You can make small tiles that repeat seamlessly for pattern fills and web page backgrounds, or larger patterns that can be used as image elements themselves. You can turn those elements into Picture Tubes, or even "animated" Picture Tubes!
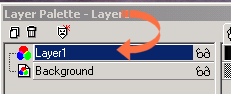
Let's make a large version, for starters. Open a 400x400 pixel, 16.7 million colour image in Paint Shop Pro, with a transparent background. Add a new layer by clicking on Layer, New Raster Layer, and OK. We won't be using a lot of layers now, so it's not necessary to worry about naming the layer, etc. Make sure Layer 1 is the active layer, not the background.
Open the Sinedots II filter from your Plugin menu, and apply a Sinedots preset of your choice. A fairly low Inner Density setting with a bit higher Add Factor, seems to work best. Remember, using the Normal blend mode setting will cause the filter to be applied to a black background, no matter what image you've started with. If you'd like to add a curve to a different colour background, play with the Blend mode settings, max weight, screen and overlay often apply the curve to the existing background.
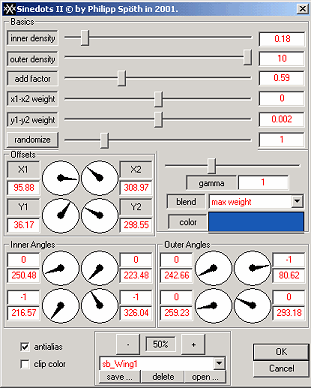
The
settings above, produced a curve shown on the right. Click okay and it's
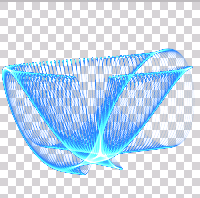
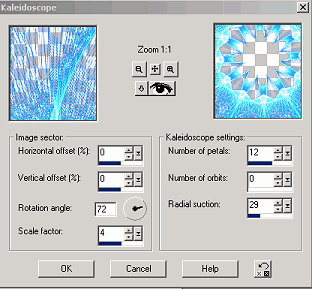
applied to Layer 1. In PSP 7.04, go to Effects/ReflectionEffects/Kaleidoscope.
You can play with the rotation angle, scale, number of petals and orbits and
the radial suction, to give you a pleasing image. Click on the ![]() eye-con (smile!) to preview the effect full-size on your image.
eye-con (smile!) to preview the effect full-size on your image.
The settings above gave me the following image -

Since
this image is on a separate layer from the background, I can now tailor it to
meet my needs. I can click on the Background layer to make it
active, then click on the Floodfill tool ![]() .
In the image below, I've filled my background layer with a radial gradient, and
then clicked Layer 1 to make it the active layer, and added a small drop
shadow.
.
In the image below, I've filled my background layer with a radial gradient, and
then clicked Layer 1 to make it the active layer, and added a small drop
shadow.

You can make smaller images to use as Web page backgrounds, the smaller the better. It's best to start your image at a size that you intend for the finished image, when designing detailed Web backgrounds, as much detail and quality can be lost during resampling.


I can also leave the background transparent, go to Layers/ Merge/ Merge Visible, and then Export the image as a Picture Tube. If you do choose to save your image as a Tube, I suggest leaving any drop shadows off the image, since many people like to add their own shadows, and tubed images are more versatile without them.
Let's try to make an "animated" Picture Tube now! (What's "animated", I hear you say? It's a Tube which looks like it's moving while you are using it, hard to explain but you'll catch on quick! A good example is the "Spiral Circles" Picture Tube that is included with PSP 7.04.)
Leave your background transparent when you make your Sinedots/Kaleidoscope image, and then go to Layers, Merge, Merge Visible, and then Save As a .psp format file. Your image should resemble this -
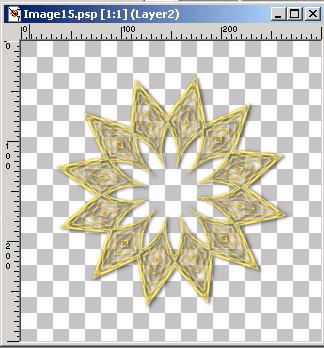
Now I know I know you see the drop shadow I put on there, and I know I just told you not to put drop shadows on your tubes, but... rules are made to be broken, particularly when playing with Paint Shop Pro! Besides, I was testing you to see if you were paying attention. Very good, you passed. *smirk*
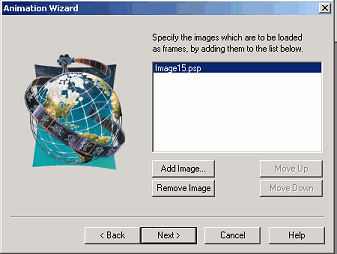
Go to File/Jasc Software Products/Launch Animation Shop. When Animation Shop is open, go to File/Animation Wizard. In the Wizard dialog, accept all the default settings, as follows -
click the radio button for "same size as first image frame" and the Next button
click the radio button for "transparent" default canvas colour, and Next
click the radio buttons for " upper left corner of frame" and "with the canvas colour" and Next
click the radio button for "play it 1 time." Leave the frame animation time set at 25, and Next
In the next wizard dialog, you will select your image file to add to the animation. Click on Add Image and browse to the image file you made in Sinedots and PSP. Click Next.
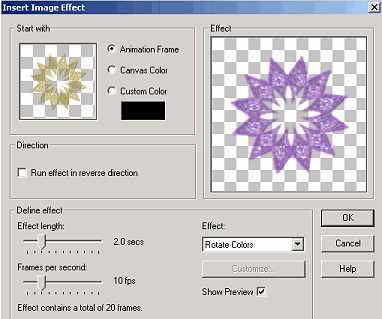
Click Finish and your single frame animation will now show on the Animation Shop workspace. Now, we'll turn it into a real animation! Go to Effects, Insert Image Effects. From the Effect menu, choose Rotate Colors. You can change the number of actual frames, and therefore colour changes, that will be produced, by changing the Frames per second slider. Click OK.
Click on View/Animation to see the animation at work! You can save that if you like, as is, by clicking on File/ Optimization Wizard and following the steps, but we are going to use this animation as a Picture Tube. So click on File/ Export Frames/To Picture Tube.

Make sure you choose the "All Frames" export option, Continuous Placement mode, a small step size, and Incremental Selection mode. Name your tube and click OK.
Go back
to Paint Shop Pro, open an image of your desired size, and select the Picture
Tube tool ![]() . Browse to your new
Tube... and start applying it! Doesn't it seem "animated" as you
are applying it? You can play with the Step adjustment if you want more
or less space between the tube objects.
. Browse to your new
Tube... and start applying it! Doesn't it seem "animated" as you
are applying it? You can play with the Step adjustment if you want more
or less space between the tube objects.
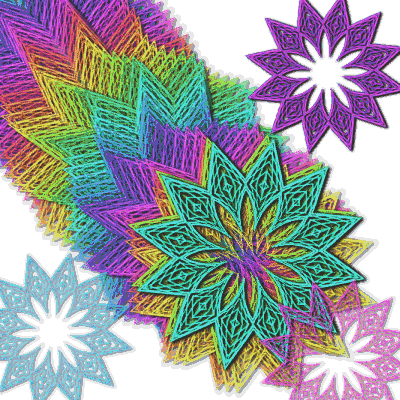
Many other Animation Shop effects work well as "animated" tubes. The Image Transitions can produce some neat Tube effects. Try a few and share your results! Here's the zipped up version of the tube from the example above. (Warning, it's a pretty darn big Tube, due to the number of objects in it!)
Want to learn more about Photoshop-compatible plugins? Check out the Filter Frenzy series of classes at www.lvsonline.com .
While you are at it, drop by the PSP Vector Toons, FrontPage 2002, and Xara X classes!
|
|
|
|
|
|
|
©1999-2001 Sally Beacham and dizteq.com