| |
|
||
|
|
|||
|
|
|||
|
|
|||
|
|
|||
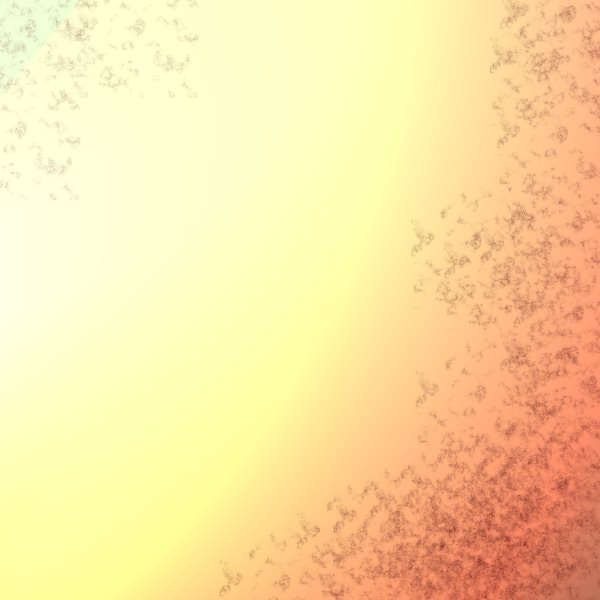
Paint Shop Pro 9*works in Paint Shop Pro versions 8 and X, too!* Let's make some background "papers" and backgrounds, using Paint Shop Pro 8,9 or X's "Lights" effect. This will create beautiful smooth washes of colour, in non-uniform areas, that aren't easily created with the brush tools.
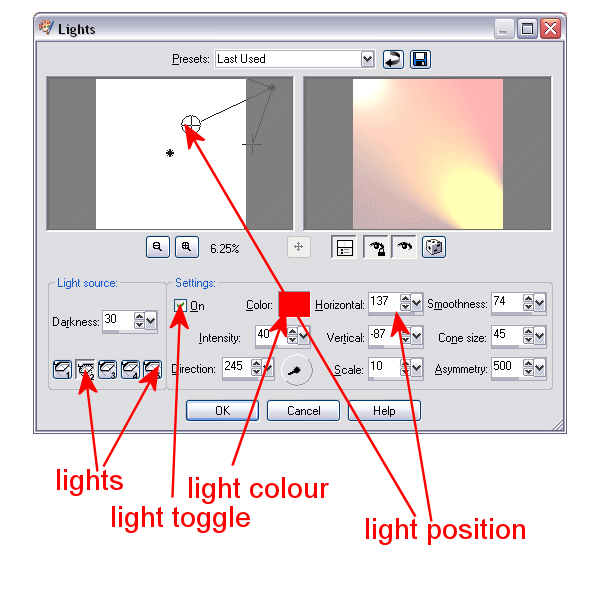
1. Open a new image, of your preferred background size. I'll be using a 2400x2400 pixel image for this, which equates to a 12x12 inch scrapbook background paper at 200 ppi. Fill this image with the color of your choice. I'm starting with white, but you can experiment with different colours. 2. Go to Effects>Illumination Effects>Lights.
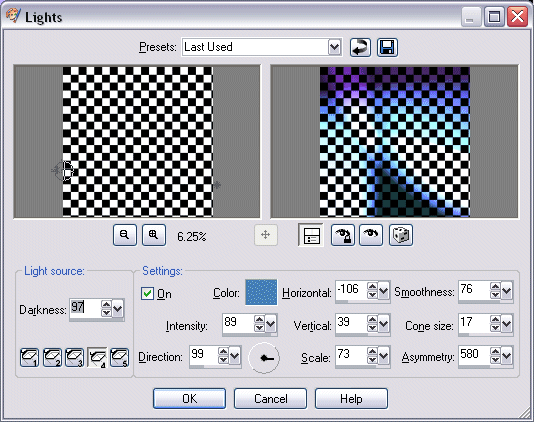
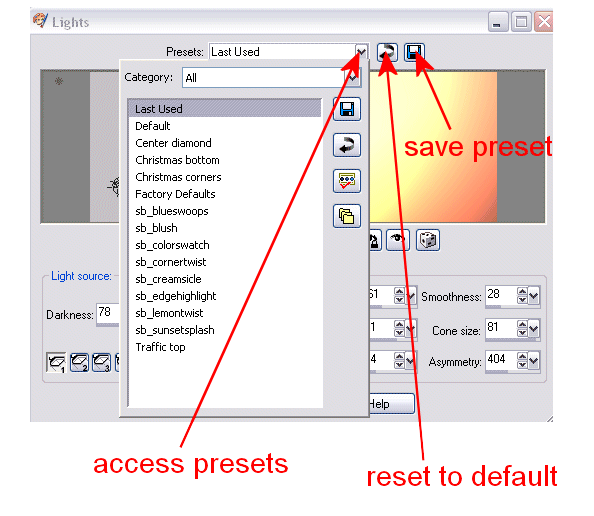
Here you'll be able to use up to 5 different "lights" to wash colour over the image. Click on the light number to activate it. Turn it "On" by checking the "On" box (oddly enough!) Set the colour of the light by clicking directly on the colour swatch and choosing the light colour you want. You can change the position of the light by dragging the light object in the left pane, or by setting the Horizontal and Vertical positioning controls. The Intensity setting controls the strength of the light, and is modified by the Direction and other light controls. Click OK to apply the lights when you are satisfied with the colours shown in the Preview pane on the right. 3. You can also apply the Lights effect over a pattern fill for a great effect. Here I've filled my background with a black and white checkerboard pattern, and then applied the Lights effect with a different combination of lights. I 4. If you'd like a few preset Light combinations for Paint Shop Pro 9, you can download mine HERE. Download the file, unzip it to your My Documents>My PSP Files>Presets folder (if that's where you store your PSP presets.) To access the presets, open the Lights effect dialog, and click on the down arrow to the right of the Presets category name. Click on the name of a preset to apply the settings in the dialog.
Save presets of your own by clicking on the "disk" icon, and name it a descriptive name. It will show up in the Presets category list for the Lights effect the next time you access the dialog.
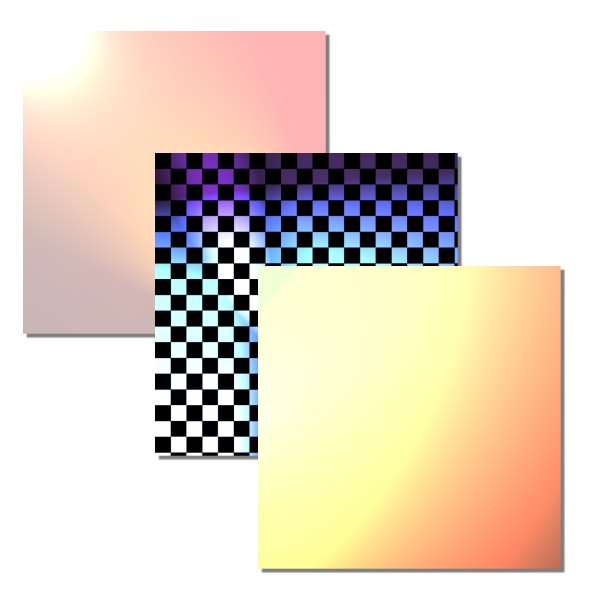
Use these paper "as is" or apply texture effects, or additional decorative effects. Here I've added a grungy effect with a Marble brush and a texture set in the Materials palette. I lowered the density and opacity on the brush tool settings to vary the effect in the corners.
|
|||

© Sally Beacham and Dizteq.com 1999-2006