With
Paint Shop Pro 6 came vector abilities which can be used
to do precise selections from. Here is the methods I
would suggest one uses with the new tools which I call
the trace method.
I suggest we start with an image in this case
I'll use a cropped version of my dog picture
shown above. The first thing is select the Draw
Tool and set
it as shown below in Fig. 1. I also suggest you
pick a foreground color that will show easily on
the image (I chose red).
Fig. 1
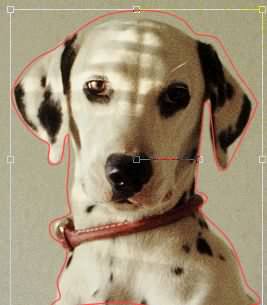
Now all we need to do is draw a line around the
dog as close as we can. We will adjust this line
to work as our selection as we go on so don't
worry about being perfect at this point. You
should have something similar to Fig. 2 (shown
half size) once done with the drawing.
Fig. 2
We are now ready to start our fine tuning of the
line using the vector node edit functions. To do
this you need to get the Vector Object Selection
Tool and right
click somewhere on your vector line. You will
then get the pop up menu and chose Node Edit.
From here we move our lines around until we have
every thing lined up. One note here find the
start and end node and join them
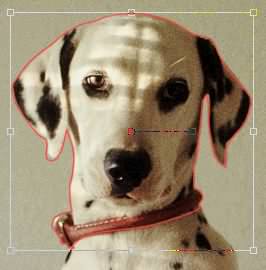
Once we have our trace outline done as shown in
Fig. 3 below it is just a matter of selecting the
area you want. I would suggest selecting the area
you want, either inside or outside your line with
the wand. Now simply go to your layer with the
dog and you are ready to grab what you want. At
this point you can use the selection to make a
mask or promote the selection to a new layer.
Fig. 3
Below is the finished image as selected using the
method discribed in addition to Masks > New
> Show Selection. It isn't the quickest way to
do the job but can be very effective if one has
patience.
The possibities are endless with this tool in
your bag of tricks and I hope you found this
informative.
This page reposted by permission, Joe Cilinceon
April 2002