
|
|
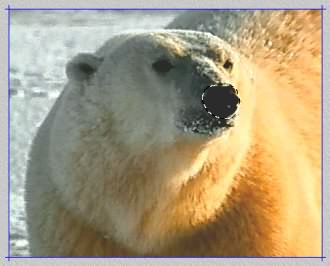
Plastic Wrap TipsSet UpSetting up the file for use with Plastic Wrap is easy. You must first make a selection on your image, where you want the subject of the image to push against the plastic, causing tension wrinkles and bulges in the plastic. Typically you can use the lasso tool in Photoshop or Paint Shop Pro to create a rough selection. It is also recommended you add a slight feather to the selection as this softens the selection for best results. See the image below for the selected area I used with the bear. |
|
 |
|
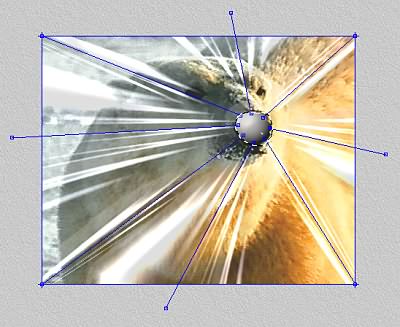
Adjust the Tension Lines
|
|
 |
|
|
To save this effect, you must use the File > Save function in DreamSuite, regardless of the version you use. This is due to the fact nothing outside of a selection will be passed back to an application. I recommend you save in psd or tiff file format for best results. You can then load this saved copy into your graphics editor, and work more with it. |
|
|
|
|
|
By Joe Cilinceon, © August 7, 2002 |
 The Tension Lines define where the plastic wrinkles, under the tension of the
object, pressed against the plastic. Select the Tension Lines tool, and then adjust the tension lines
by dragging them around, and adjusting each end as desired. Select an end by clicking and dragging
on it. This changes the angle of the tension lines.
The Tension Lines define where the plastic wrinkles, under the tension of the
object, pressed against the plastic. Select the Tension Lines tool, and then adjust the tension lines
by dragging them around, and adjusting each end as desired. Select an end by clicking and dragging
on it. This changes the angle of the tension lines.