|
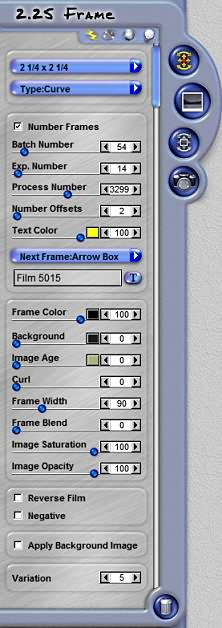
Set Text Button
When you click on this button, the Set Text dialog window will appear allowing you to set the text that will be
rendered onto the effect.
Frame Color
This slider and color box gives you control over the color and opacity of the frame. Lowering the slider settings
will make the frame more transparent. The transparency of the frame will create a more translucent shadow under
the frame. Click on the color box to change the color of the frame.
Background Color
This slider and color box gives you control over the color and opacity of the frame.
Image Age
This slider applies an aging color to the image inside the frame. The slider sets the opacity of the age tint,
and the color box sets the color of the tint.
Curl
This slider combines intelligent shading and depth shadowing to provide the illusion of depth by bending the
image and the shadow.
Frame Width Curl
This slider defines how wide the frame area is rendered onto the effect. Lower settings result in a smaller
frame around the image. If you decrease your frame size too low, any text rendered onto the frame will show
on the image.
Frame Blend
This slider Blends the Frame into the image with a gradual irregular pattern.
Image Saturation
This slider allows you to control how saturated the colors are on the image inside the frame.
Image Opacity
This slider defines the opacity levels for the image inside the frame.
Reverse Film
When this box is checked, the image will be processed in the opposite direction (flips the image vertically).
Negative
When checked, the image will be processed as a negative inside the frame.
Apply Background Image
When checked, the background image behind the selection will show up in the preview and will also apply as
part of the effect.
Variation
This slider controls the random generation of settings used to create each effect's distinctive patterns.
|